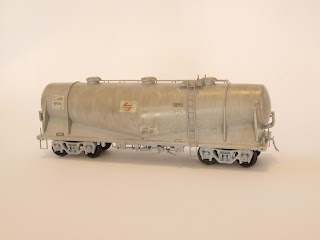
I've just finished the weathering job on the first NPRY wagon I've built and detailed.
Overall I'm happy with the look, however there are a few things I will change next time. I should point out that I've used Tamiya and Mr Hobby Colour acrylics as they are much easier to use and clean up, and I am happy with the colour ranges available.

This is the base wagon, primed and decalled (pretty stock standard). I decided not to bother with a bare aluminium finish as the base because it wouldn't be seen anyway.
I washed over the wagon with a diluted coat of Tamiya XF-20 Medium Grey, and after that dried I went over with a diluted coat of XF-73 Dark Green. These colours gave a streaked base on which to apply the cement dust which adorns all these kinds of wagons.
This is where things become unique to each wagon, and one really must consult prototype photos depending on the look they want to achieve. I started with a light coat of Tamiya XF-24 Dark Grey in areas around the hatches, under the walkway and generally over the tank. The a light coat of Mr Hobby Colour H-51 Light Gull Gray over the body and to pick up detail, as well as the vertical spill lines down the body. Then a coat of XF-54 Dark Sea Grey to blend it in and further add to the 'dusting' effect. Note the 'workshop' bogies applied.
After the tank body had dried, I applied a layer of XF-24 Dark Grey to the underframe to give it depth. I then followed with a coverage of XF-79 Medium Deck Brown to give it a general road grime, followed by a light coat of Mr Hobby Colour H-44 Flesh to pick up detail and give some variety. I also gave the body a very light dusting of these brown colours, though it's not visible.
Whilst I had those colours loaded in the airbush I went over the bogies in the same grey-brown-light brown order as above.
I left it all to dry, then used a paint brush to pick out the white levers and handbrake wheel. Also coloured the bearings and spring on the bogies. I wiped over the code-board with a brush dipped in thinner; as if somebody had cleaned it so see the wagon number through the cement and grime. I also trimmed the trip-pins off the couplers and bent the air hoses around, so when the wagons are coupled they will connected.
The view of the other side of the wagon upon completion.
The main thing I learnt from weathering this wagon was patience; letting the first layer dry before proceeding onto the next is important to avoid spoiling the work already done.
I currently have 1 more NPRY wagon ready for weathering 1 ready for painting and another which I'm adding details to now. I will post up the results of these jobs once I get around to them.
Comments or feedback are welcome.
Cheers.
Cheers.
Links:


